Making a Deer Antler Knife Handle
Buying a blade without a handle is cheaper than getting a handled one and it gives you the opportunity to design a handle to suit your own carving style or just to add character to your knife. As well as that, many great small-scale blacksmiths just don't sell them with handles. I decided to use a deer antler I was kindly given to make really characterful handles for some blades I got recently from Nic Westermann and Svante Djärve. This is how I did it!
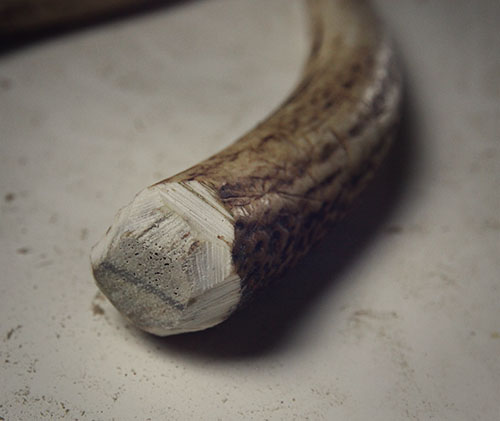
First I cut off the tines off the antler, as close as possible to the main stem, with a hacksaw. You want to make the most of the straighter part of the tine which is usually the part closest to it's base. Incidentally, you will discover what burning antler smells like. You can add that to the list of useless but kind-of-interesting things you know! The centre of the antler is porous, like the spongy centre of bones, but the outside layer is really incredibly hard. I suppose it is adapted as a weapon for bashing repeatedly against other antlers so it would have to be tough. The main part of the antler is a bit too large for a knife handle but maybe I'll use it for a parang or something later.
Next thing to do is bevel the edge where the handle will meet the knife. You don't have to do this but it makes the knife more comfortable to use. You can also do this later but it's much more difficult to do once the knife has been mounted. I clamped the handle in the vice (wrapped in leather to avoid damage) and created most of the bevel with the hacksaw. It can then be rounded with sand paper. I did try bevelling it with a knife before I realised quite how hard it is. I'll save you the bother of resharpening your knife by advising against that.
At this point, I also tried the feel of each handle in my hand and decided how the blade would be orientated in the handle. This will depend on the curve of the tine and what type of grips you will use with that particular blade. Generally, I would recommend that you orientate the handle so that it curves downwards, towards the sharp edge of the knife, as in the photos. I marked the orientation I decided upon in pencil here for later reference.
When you buy a blade without a handle, you'll notice that the tang (the bit that extends into the handle) comes in different shapes and sizes. Most are flat but some are round. I happened to have blades with both. Round tangs are much easier to mount because you can drill a hole the exact diameter of the tang and just stick it in. A flat tang is a little more difficult. In wood, you can sometimes just drill a slightly undersized hole and force the flat tang into it, using a strong glue like epoxy resin. This works fine for crook knives for instance, where the strength is not critical. Otherwise, you can fit the tang into a slot in a dowel and then mount the round dowel in the handle. Nic Westermann actually provides a slotted dowel with each knife he sells which makes life easier. For an easy way to make your own dowels, have a look at this post.
Even where the blade had a round tang, I wasn't sure it was a good idea to mount directly into the spongy material in the centre of the antler. I decided it was best to mount the knife within a dowel because I would be able to use a larger drill bit and drill out the weaker spongy material altogether.
Try to use a long drill bit to drill the hole if possible because this helps with lining up. It's fairly easy to go off centre or too deep in the curved handles. A hole the exact size of the dowel will give a snug fit without having to really bash the tang in.
Before you begin mounting the blade, make sure to wrap it up in a good many layers of masking tape to protect yourself and the blade's edge. Even so, take caution when driving it in! I used a two-part epoxy resin to glue the tang into the dowel and then the dowel, with the blade, into the hole. I did these things in one step. I'd recommend a slow-drying glue to give you some time. I chose to grip the blade in the vice (with leather) and drive the handle onto it. Leave the dowel long so that it protrudes from the handle slightly. This can be neatly trimmed and sanded flush later. If the tang has a notch near base of the blade, as Nic's do, try to make sure this ends up bedded into the handle to give extra resistance to torsional movement.
It's a satisfying thing to make your own knife handles. And I recommend doing it with all your knives once you've been carving for a while and you know what you like in a handle. Now, as I sit and carve, I can feel the deep scratches and scars in the handle and I imagine the stag to whom it belonged, battling another young stag on a hillside in Donegal. That's character.

_edited.png)


Comments